


It was time for me to prepare for a live demo at a meetup. As always, I used Heroku, my go-to deployment service. Unexpectedly, I discovered that Heroku no longer offers a free version 😱 and it's time to explore alternatives. After investigating some alternatives, I found Railway.app, which provides Node.js hosting, database hosting, and a great developer experience.
Railway.app has a great free plan, which includes 5$ monthly credits and a 500-hour limit that disappears as soon as you enter your credit card details. With these credits, you can run approximately two full sites with a database and still have a few cents left over 😋.
To demonstrate the deployment process with Railway we'll use the following GitHub repository that I've created in my last BudapestJS meetup Todo Demo, using Remult.
git clone https://github.com/noam-honig/budapestjs-meetup
Once you've cloned the project, it is actually ready for deployment, but let's review some of the key settings I've set for it before the deployment in src/backend/index.ts file:
Preparing the app for deployment
Postgres connection string - To set a database connection for Remult, we need to set the
dataProviderproperty, and here we've done that withcreatePostgresConnection.On line 44 in
src/backend/index.tsfile:connectionString: process.env['DATABASE_URL'] || 'postgres://postgres:MASTERKEY@localhost/postgres'We've configured the
postgresdatabase connection string to the connection string received as an environment variable calledDATABASE_URL.That environment variable will be automatically set by
railway.appto the correct connection string for the associated project.Port - On line 58 in
src/backend/index.tsfile:app.listen(process.env['PORT'])We've configured
expressto listen on the port that it receives as an environment variable - that port will be set by therailway.appenvironment according to their required configuration.Session Secret- On line 13 in
src/backend/index.tsfile:app.use('/api', session({ secret: process.env['SESSION_SECRET'] || 'my secret' }))We've configured the sessions's connection string to also be determined by an environment variable - that variable will be set by us on the project settings on railway.app.
Setup a railway.app account
Visit railway.app and create an account.
Install the
railway.appclinpm i -g @railway/cliSign in to railway:
railway loginAnd hit Enter, to login by the browser:
Press Enter to open the browser (^C to quit)
Deploy your app to railway
In your project folder, type:
railway initAnswer a few questions and as soon as you're done - railway will create the project and open it in the browser.
In the project console in the browser, select
Add a Serviceand chooseDatabase, thenAdd PostgreSQL.
At this stage, railway will create the
Postgresdatabase for this project.Once the database is setup, go back to the terminal in your project folder and type:
railway upThis will upload your source code to Railway. Wait until the deployment is complete, without errors:
 ======= Build Completed ======

 Waiting for deploy to finish
 ☁️ Deployment logs available at https://railway.app/project/......
 OR run `railway logs` to tail them here

 ☁️ Deployment is live
Once the source code is uploaded, Railway will run the following commands automatically:
npm ci: installs all the necessary npm packages.npm run build: builds the projectnpm run start: runs the project.
Make sure that the build and start scripts in your package.json do what you want them to do :)
Once
railway.appis building the project, we'll need to assign it a url that works. On your browser:Find your newly deployed project in the Railway project dashboard, near the
Postgressservice.You might need to refresh the page to see it.
Click on the deployed project.
Click on the
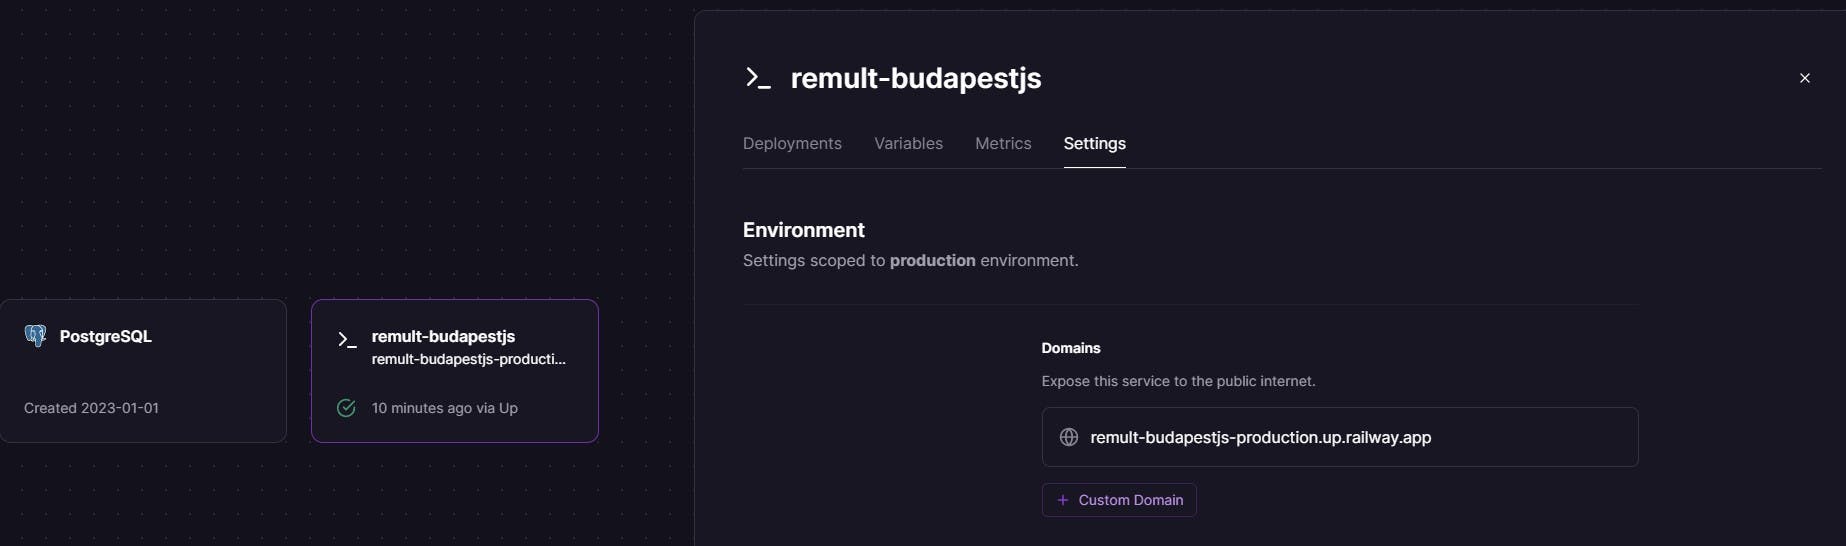
Deploymentstab. You can read the deployment logs to make sure there were no errors.Click on the
Settingstab.Under
Environment, Scroll to theDomaintitle and click theGenerate Domainbutton.It will generate a domain that you can use to open your app.
Click on the generated url - and be a little patient - it will take it a few minutes to be up and running.
Here's a video of our BudapestJS meetup where we used this method as part of our demo, where we showed how to turn a front-end React app into a full-stack app using Node.js, Postgres, and Remult. The video's timeline is positioned at the deployment stage. testing